There are many ftp programs available to use and many programs incorporate
an ftp transfer routine within the program. FileZilla is one of the
most popular full featured ftp programs. It is not so complicated
that a novice can't use it but it has features that the expert can
use. It is a 2.8 meg download.
Download the program FileZillafrom this site:
http://sourceforge.net/projects/filezilla.
It may recognize your computer type, but if not click “All
files” and select the one applicable to your operation system.
Use the recommended .exe version for Windows, or the Mac version for
OS X 10.5 or newer.
Download the file to some folder on your
computer, which may or may not be under the “Documents and
Settings” folder. You may also choose to save it in a folder of
your choice. Remember where you saved it to.
After the
download is completed, go to the folder it was saved in and double
click on the file to install the program. When going through the
setup windows be sure to check the “Desktop Icon” box so
you will have an icon on your desktop. When the program is fully
installed, double click on the desktop icon to run the program.
Note this procedure will work for transferring files to
other folders using the respective username and
password.
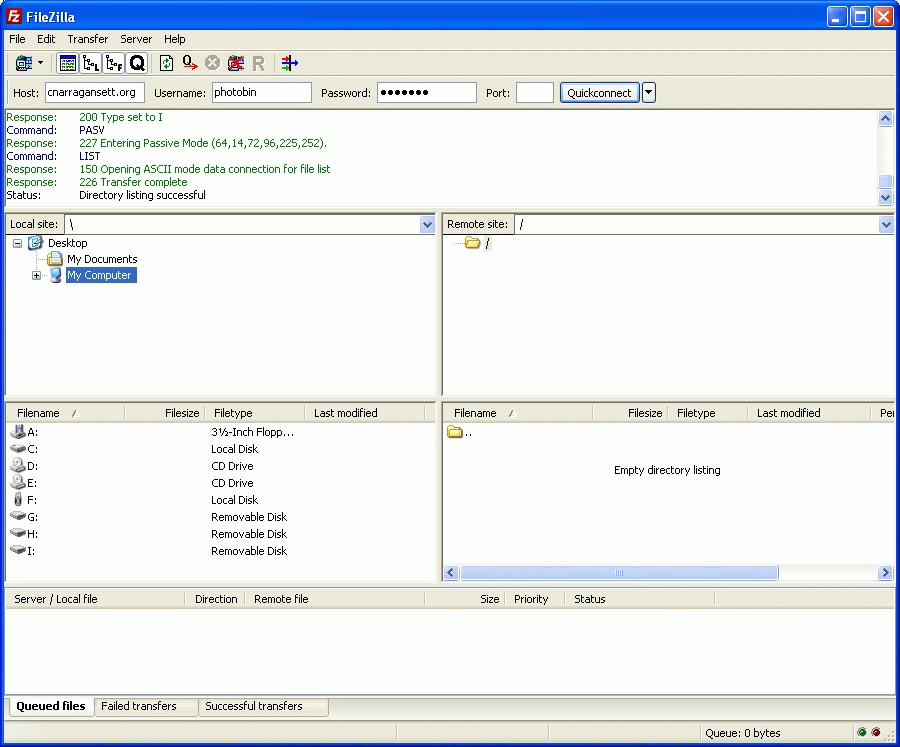
The program has a set of windows, the left windows
are on your computer as the [Local site:] and the AMC web site files
will be on the right side as the [Remote site:]. Since you only have
permission to access a limited portion of the web site, you will only
see files and folders in the 'photobin' or 'storeroom' folders. In
this case the 'photobin' folder is empty. (Tech Talk: It does not
label it the 'photobin' folder because the ftp program is treating it
as the “root” directory, which is indicated as a /.)
We
will use the [Quickconnect] method at the top of the program to
select the server to upload to. In the [Host:] field type in
www.amcnarragansett.org, in the [User:] field type in photobin, in
the [Password:] field type the password. Email the webmaster for the password. It is not the general password.
Then click the
[Quickconnect] button. You will see the connect process in the
console window.
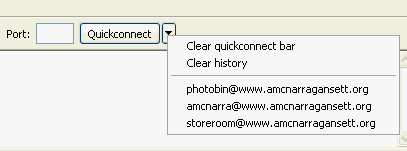
Note: When you finish the program the username and password is saved in the history queue, so when you open the program up later to upload more files you only have to click on the 'down' button to select the link to connect to.
As an example we are going to upload some photographs to the 'photobin'
folder on the server. In this case all the photos are in one folder.
Use the “Local Site:” window to find your folder with the
photos. When you click on that folder, the files names will popup in
the “Filename” window. You can tag the files you want to
upload by holding down the [Ctrl] key and using the mouse to click on
the files you want to tag for uploading. Or if you want to tag them
all at once, click once on one file to highlight it and do Ctrl-A
which will tag all the files.
If you have files in different
folders you can individually select files then right click for
options and “Add files to the queue”. This will put the
file in the bottom window which is for Queued files . This is a
temporary place where files are held until uploaded. The next image
shows that I have tagged 2 files for uploading.

(Tech Talk: If you are having problems with the connection timing out and reconnecting go to the Edit/Settings in the menu and change the timeout setting to something larger, in this case I have set it as 60 seconds.)
You can now either, left click and drag the highlighted files to the [Remote Site: ]window, or use the right mouse click on the highlighted files to pick the Upload option. The files will now upload to the server. This is seen in the next image. If you want to download files, the process is just the opposite.
Notice that the files have been placed in the Queued files window and are transferring to the web site. When you drag the files to the Remote site the program automatically puts them in the queue window for you. When the transfer is finished you will see the files in the Remote site as below.
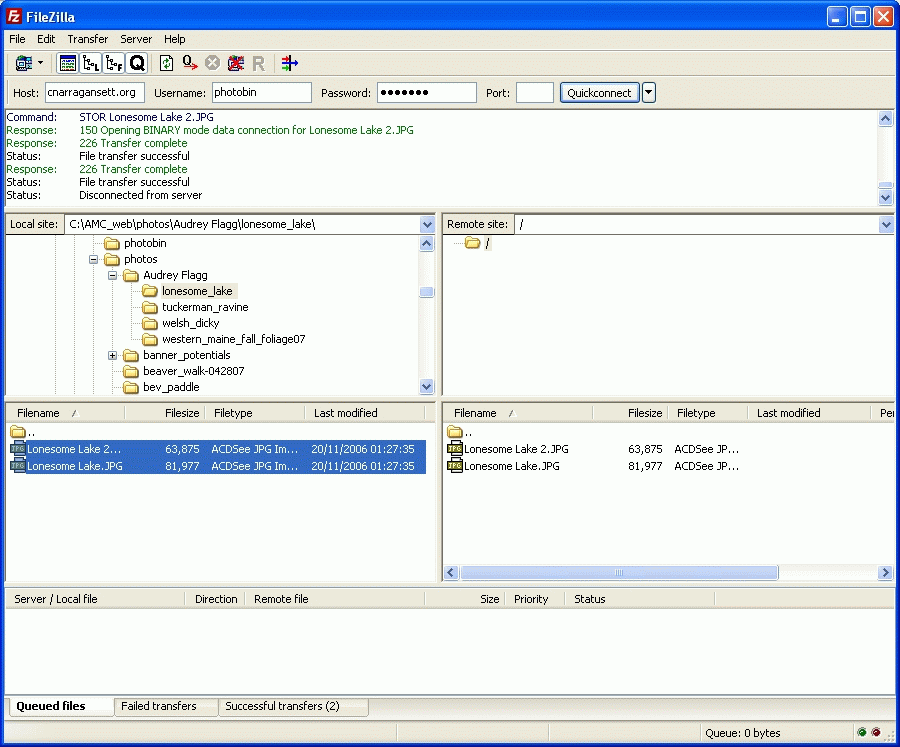
If you want to delete any file, including ones already uploaded in the Remote Site, you can use the right mouse button to select the delete option. When all the files have been uploaded you can just close the program with the File/Exit menu or just click the red X window button.