My Cheap 20 watt Bike Light
by Michael Krabach
[Additional Variations
and Safety Suggestions]
Updated
2-10-2008
[The
LED Bike Light Experiments]
Created
2-12-2008
-
Most cheap clip-on style bike lights do not give enough
illumination for riding streets at night. This is not a safety issue
of having the cars see you, but the issue of you seeing the road in
front of you.
The Idea
- When touring I found that my 3
cell plastic army flashlight attached to the handlebars with two
elastic bands worked quite well. The two large elastic bands would
hold it secure and allow some limited adjustment of the beam.
(handlebars in the photos are triple taped for comfort, but also
helps holding the light).
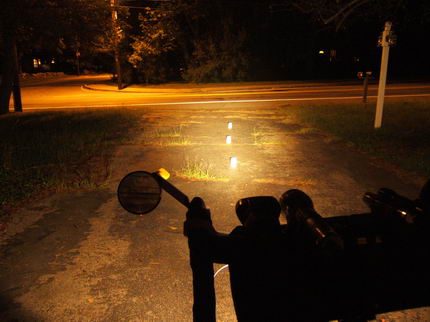
The Problem
- For riding at night on
purpose, I needed a more powerful light to see the road clearly out
to a good 50 feet. Several companies have come up with, in general,
expensive bike lights. Nite Hawk is a common brand. These are really
nice, have built in chargers for the batteries, and give up to 20
watts of light or so. But they are in general over $100 or more, and
some types are several hundred dollars. My problem is being cheap.
Serendipity
- Then while browsing
one day in 'Home Depot' I was looking for a cheap12 volt designer
(home type accent lighting) fixture that I could modify to put on my
bike. Nothing looked suitable, but what struck me was the size of
the small bulbs. Quickly I measured the bulb and went to the
flashlight section and measured the flashlights. Looked close
(blister packs prevent close measuring). So I purchased both flood
and spot pattern bulbs and checked it out in a Mag-Lite flashlight
at home. Voila!
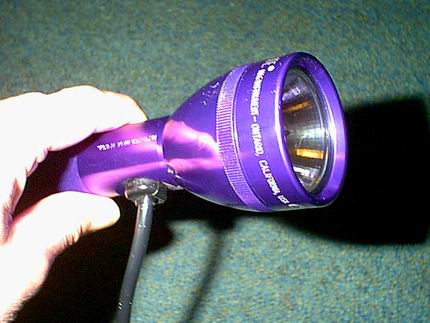
The Solution
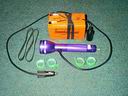
Click
any image for larger image
- The result is the cheap 20 watt
bike light. I found that the spot
pattern is best for biking and the flood pattern was better for
a car light. I also found that a standard
sealed lead acid battery (Gel Cell type) would fit
in a standard water bottle cage if the upper lip was cut off. So
now I had the same power for a fraction of the price. Specifically,
20 watts for several hours, depending on your battery size, only
costing from about $40 to $60. This conversion also makes a
really nice general purpose 20 watt flashlight. It will be
about 10 times brighter than a regular flashlight.
The “How To” Section
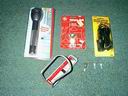
Required Items
Gel Cell type
sealed battery, 12 volt, 6.5 Amp Hrs, $6 -$24
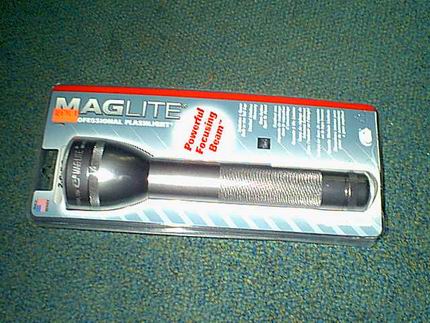
Mag-Lite C cell type
flashlight, $14
20 watt, 12 volt
sealed halogen designer spot light, $5-$8
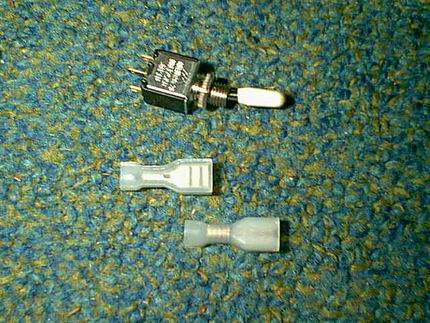
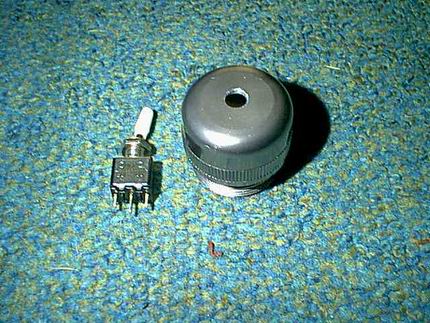
small microswitch, $3
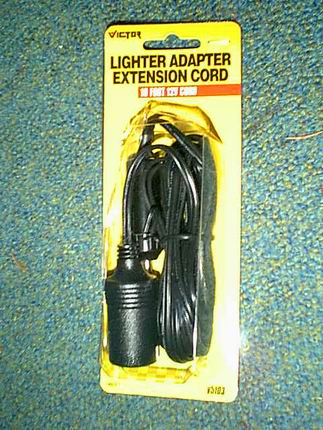
Car cigarette lighter extension
cord, $5
2 crimp terminals that fit the
battery terminals
Heavy bike water bottle cage,
$9
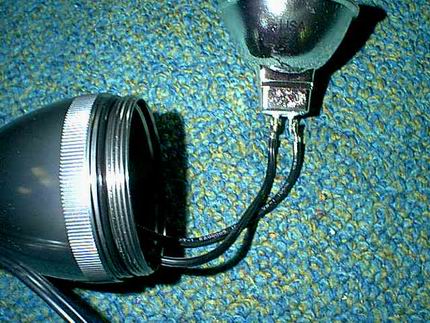
When the bulb and
reflector assembly is removed, the 2 inch halogen bulb will fit
inside. The “D” and “C” size Mag-Lite
flashlights have the same reflectors, but the “C”
flashlight is smaller, lighter and costs less.
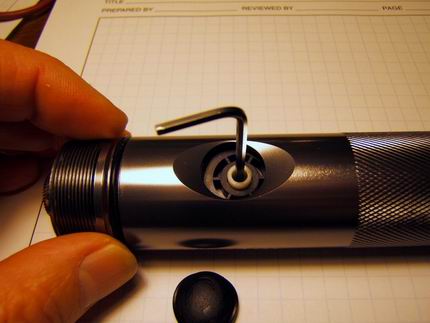
(revised) Unscrew the head
assembly of the flashlight and unscrew the battery compartment cap.
Remove the rubber switch cover from the switch opening. Inside the
switch you need an allen wrench to undo
a set screw deep in the switch. Mag-lites have slightly
different internal construction, so depending on the specific
Mag-lite, push the switch assembly out one
of the ends of the tube.
Drill a ¼ inch
hole in the battery cap to accept the
microswitch. There is a dimple on the inside, so it is easier to
center the drill from the inside of the cap. Do not install the
switch yet.
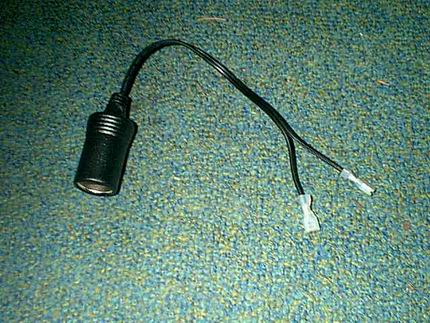
Cut the cigarette
lighter extension cord about 6 inches from the “female”
end. Trim and crimp the terminal connectors to
the wires.
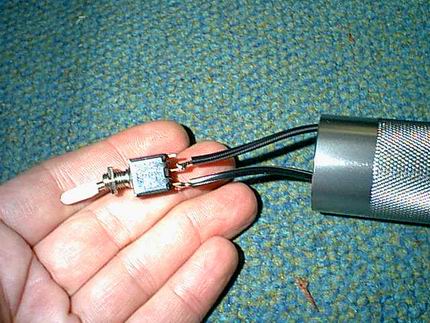
With the other end of
the extension cord, pull apart the wire about 12 inches or so, and
pass it through the barrel switch hole.
One wire (for the switch) will loop out the back and both will come
out the front. The end loop will be cut and trimmed for installing
the microswitch. The wires out the front are to be soldered
to the bulb. NOTE: Be sure to pass the bulb wires thru the light
“focuser” before soldering the bulb. The thick gage of
the wire will require all soldered connections to be lap soldered as
seen in the photographs. If you have a Philips brand bulb, read
this note about altering the reflector and not soldering the
bulb.
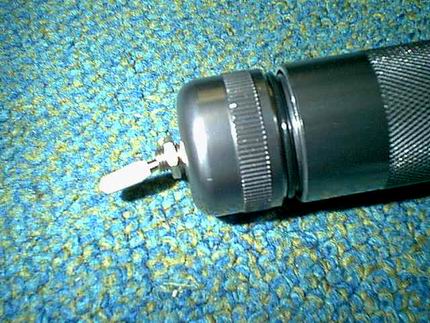
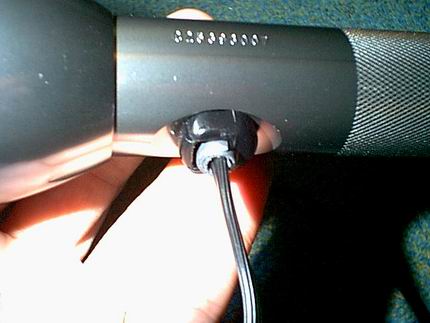
Install the microswitch
in the battery cap, but do not tighten the nut. Screw in the battery
cap, then orientate the switch, (up for on, down for off) and
tighten the switch nut.
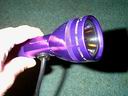
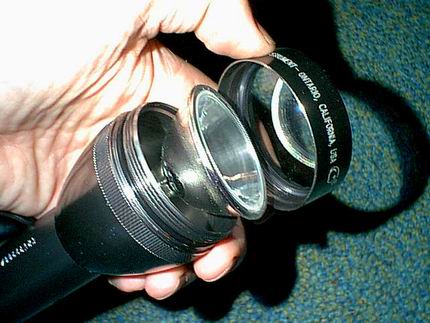
Carefully push the
excess wire down in the front of the barrel and seat
the sealed halogen bulb assemble. Screw the lens cover and
o-ring back on the flashlight barrel. The polycarbonate lens cover
stays in place to protect the sealed halogen bulb.
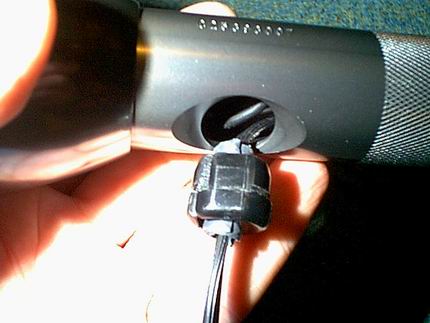
I sealed the power cord
in the switch hole by wrapping rubber tape
around the cord and snapping on a standard electrical relief insert.
This is then pinched and snapped into the
switch hole. Other methods may be used depending on what you have at
hand. Just make sure there is strain relief for the power cord.
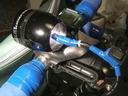
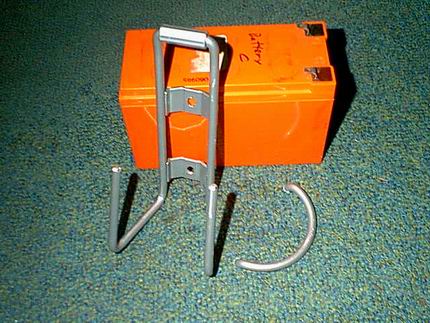
Using a heavy
water bottle cage, hacksaw of the the top, and file off any
sharp burrs, so it looks like this photograph.
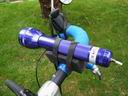
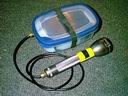
The final conversion will look
like this photo.
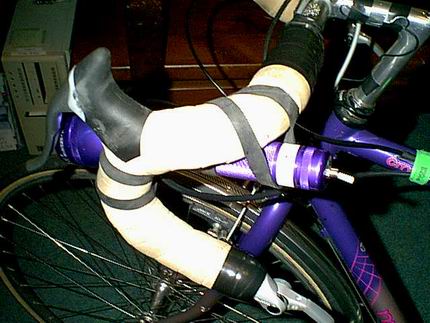
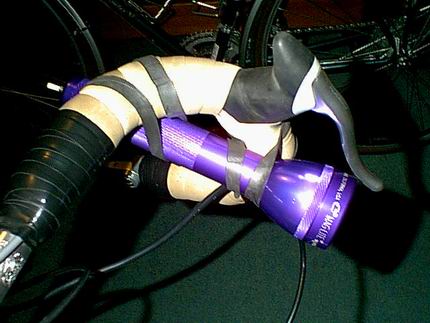
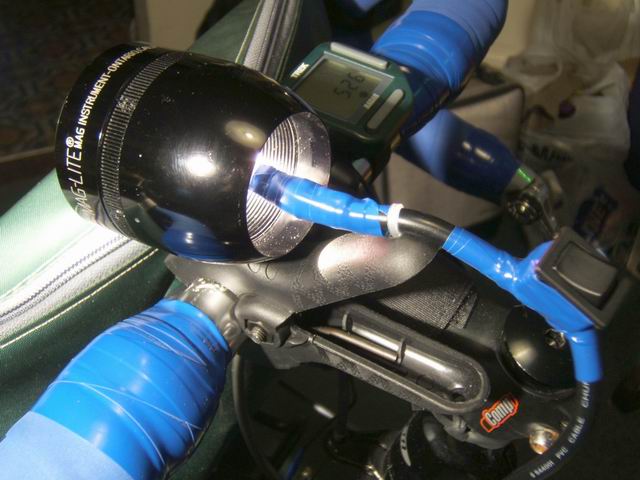
- Attaching
the Light to the Bike

- For
my bikes I have bar-end shifters which allow me to have the light up
next to the brake levers. Bikes that have the combination
shift/brake STI type system will need to mount the light head back
farther. Depending on your specific setup, you may have to use your
imagination on mounting the light. Since the only part of the
flashlight really needed is the head assembly, some of the barrel
could be cut off and used in a bracket arrangement bolted to the
handlebar.
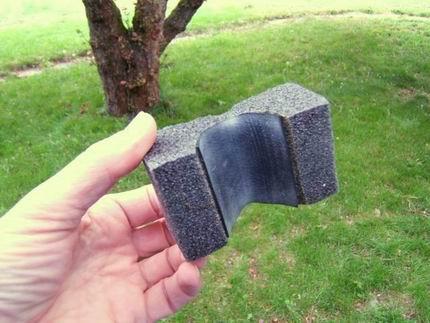
Another Mounting Suggestion

With this method a block of polyethylene foam (a stiff, slippery
closed cell foam), commonly used in packing, is carved with a V
groove in the top and a round (ish) groove cut at a right angle to
the top groove. The round groove has a piece of rubber bike inner
tube glued in the bottom area (use
rubber contact cement) to give more friction when mounted on the
handlebar.
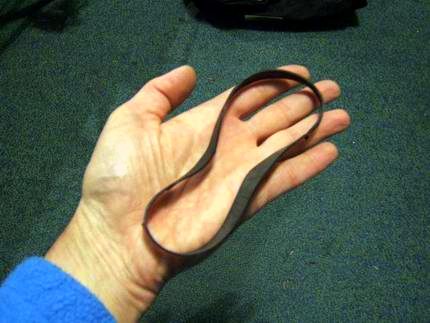
A section of inner tube (from a car
tire repair) is used to loop over the front of the flashlight, under
the handlebar, and over the back of the light, producing the above
mounting. This method is useful for STI shifters and mountain bikes.
Innertube makes a good stiff elastic and I prefer it to normal
elastic bands.
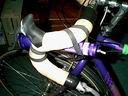
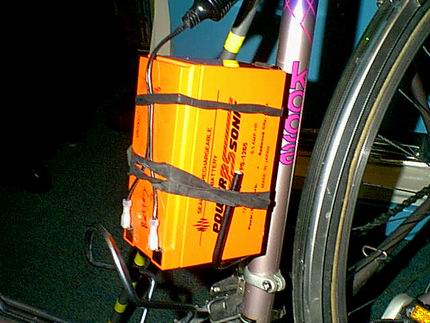
Attaching the Battery to the Bike
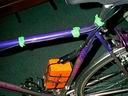
- The sealed acid battery fits nicely
in the water bottle cage and is attached with a couple of heavy
elastic bands from sections of an old car tire inner tube. Some
bikes have two bottle cages and there is interference installing the
battery. You may have to remove the other cage or improvise. Since
the system has no recharger,
don't fasten it on permanently. The power cord is run to the front
of the bike using velcro (celery bands, no less) being sure to leave
enough slack for turning the handlebars.
Other
Conversions, Variations and Safety Suggestions
- Note that a 20 watts will generate
a lot of heat and the head will get quite hot, (especially with the
Philips bulb) so I don't recommend converting a plastic flashlight
for continual use. But it can be done, as I have a $2
plastic flashlight that I converted to use with the extra GE
flood pattern halogen bulb. The wider beam is perfect for an
occasional car light that plugs into the cigarette lighter outlet.
-
 A Stripped Down Version of
the Mag-Lite Conversion
A Stripped Down Version of
the Mag-Lite Conversion -
-
This version of the
Mag-Lite uses just the head of the flashlight, thus reducing the
complexity and weight. You don't have to struggle to remove the
internals of the Mag-Lite. Which have changed slightly over the
years and models. So the previous directions might not be exactly
apply. This new version uses a plastic spring clamp to hold it to
the handlebars. It uses the same bulbs and battery as used for the
full flashlight conversion. This
section shows how the conversion is done.
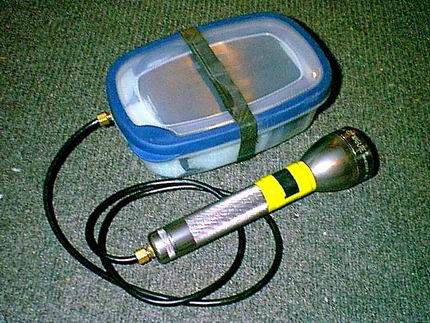
Kayak Light
-
Having purchased the Philips bulb I decided to make a waterproof
flashlight for kayaking (salt water). I used another Mag-Lite C
flashlight, a plastic Rubbermaid food container, a standard ¼
“ computer power cord, two brass Swag Lock compression
fittings, three TruSeal nuts (to backup the pipe thread on the
compression fittings), and another 6.5 AmpHr battery, Cheap
waterproof penetrations are constructed by using SwagLock tubing
compression fittings that are enlarged slightly by drilling to allow
the power cord to pass thru. The cord is sealed with a wrapping of
teflon tape under the compression nut. The battery
fits nicely with foam inserts and does not move around. For this
project I did not remove the switch on the Mag-Lite. The switch has
a thin piece of rubber taped over the real switch. The original
switch button is not waterproof when submerged several feet. When
reassembling the flashlight, use the original plastic lense cover in
front of the halogen bulb in case water is splashed on the front of
the hot halogen bulb while paddling. I used a plug of wood as a
dummy battery and wired the power cord thru the bottom of the
flashlight. The battery container is stored in the kayak cockpit and
the flashlight is slipped under the elastic deck cords on the kayak.
The 36 degree beam is broad enough to
illuminate a wide area out 50-100 feet.
-
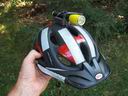
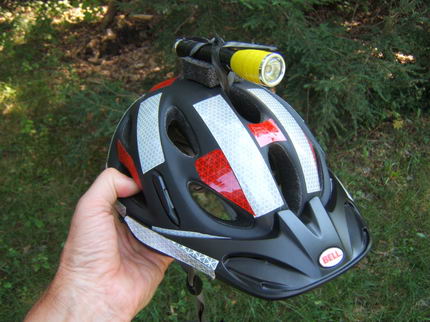
Cheap Helmet Lights and
Others
-
-
 Helmet lights are useful because they allow you to see your way
around curves at night and look at anything you turn your head
toward. Good for glancing at car drivers, to get their attention
when you are not sure they have noticed you. Some use them instead
of bike mounted lights. Many commercial models are available, but
sometimes you just want to adapt an existing light. A few good ideas
using AA lights. This
section shows some ways of doing it cheaply.
Helmet lights are useful because they allow you to see your way
around curves at night and look at anything you turn your head
toward. Good for glancing at car drivers, to get their attention
when you are not sure they have noticed you. Some use them instead
of bike mounted lights. Many commercial models are available, but
sometimes you just want to adapt an existing light. A few good ideas
using AA lights. This
section shows some ways of doing it cheaply. -
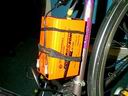
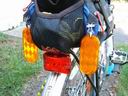
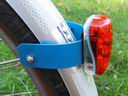
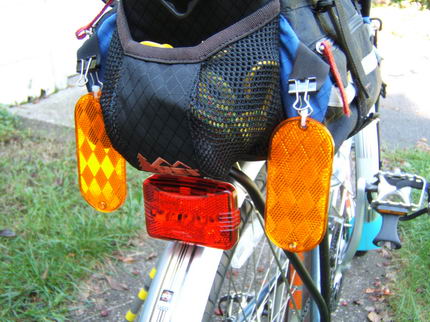
Cheap Bike Reflectors
-
-
While all bikes come with pedal reflectors (clip-on pedals don't)
and a rear red reflector and a white front reflector, this is hardly
enough to really be seen on the road night. The current generation
of flashing red lights are very good and very effective but
reflectors are nice. For
ideas to increase your visibility with reflectors see this section.
-
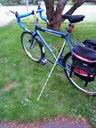
The Bike Prop and Brake
Locks
-
-
Ever lean your bike against a tree or pole and have it slide forward
or back and fall over. Ever had difficulty packing you panniers or
BOB trailer in a campground with the bike propped against a picnic
table or tree. This section
solves all that for you.
-
Dual Mirrors
-

-
A mirror on both sides of the bike just makes sense. This
is what I did to solve that problem.
-
Additional Rear Flasher
hanger
-
-
I have two red rear flashers on my bikes. One on the seat post and
one on the rear of the rack. My bike bag obscures the flasher on the
seat post. Here is how I
solved the problem.
-
Bike Light Brightness
Comparisons
-

-
After looking at all the bike light options offered on this site,
you might want to see the differences in the brightness of the
lights. You might not want to trust that new LED headlamp after
looking at this comparison. To see the difference between the Cateye
Opticube 5 LED, Lowes 1 watt LED light, the MadMax AA LED
conversions, and the 20 watt 'cheap' halogen light, link
to this section.
-
For more information on bicycle headlights, chargers, mounting, and
more, check this reference.
From the UK, bike
light resources. For information on building your own and
examples check
this list. You can also go the the Bike
Forums and do a search on bike lights. This mountain
bike forum has information on building your own.


