
Click any photo for a larger image.
Click any photo for a larger image.
This kayak or canoe hoist system enables the user to lift and store their boat in a garage, saving storage space, keeping the kayak inside out of the weather, a little safer from theft, and a lot easier to lift on and off the car. If the vehicle can enter the garage with the kayak on it, the system works very well. If the vehicle is not a normal height sedan (mine is a VW Golf 66” high) the system can not be used to lift the kayak on and off the car because you will not be able to clear the garage door. The system uses common hardware available at most local hardware stores. The total cost (basic 3x system using mini-carabiners) is about $35. So far the system has been installed in 6 garages, and under one patio deck, totaling 14 installations.
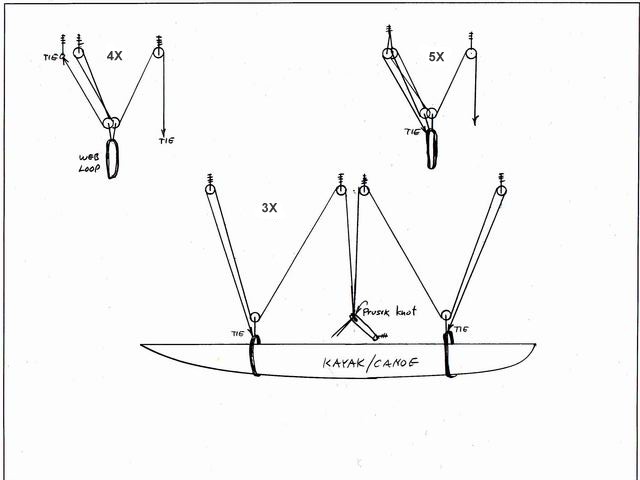
The diagram shows three pulley systems, with 3, 4, and 5 times mechanical
advantage. For single kayaks the 3x work fine. If the weight of the
kayak is 60 pounds, the user will only have to pull 20 pounds to lift
the kayak. For a heavier canoe or double kayak, the 4x or 5x pattern
could be used, reducing the effort to 15 and 12 pounds respectively.
But that means a lot more rope used and the pulling distance
increases from 3x to 4x and 5x.
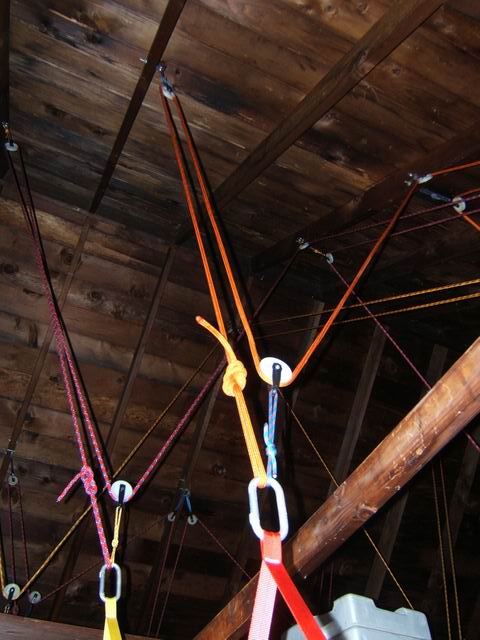
The photos below show one
installation in a double garage that has open space over the cross
supports. Other installations have been in garages that have flooring
over the rafters and one with sheet rock on the bottom of the
rafters. In those cases the ropes have been routed through more
pulleys to reach the wall connection. These installations also
usually have limited space for the pulley system over the kayak.
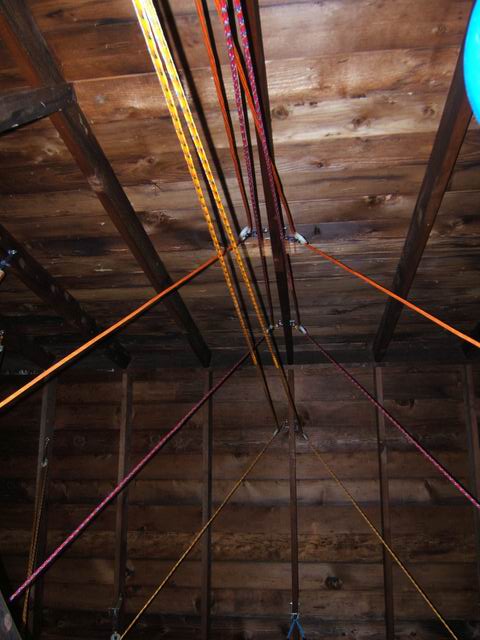
Three things can be done to lift the kayak closer to the ceiling.
Shorten the web slings (as seen in the first photo below) around the
kayak to get the carabiner closer to the deck. Use a mini-carabiner
and clip it directly to the pulley. This would remove the blue loop
in the second photo below. Third, you can remove the rope loop that
is attached to the rafter eye bolt and use a mini-carabiner to attach
the pulley. You can barely see the loops in the third photo below,
way at the top of the roof. The point of this is to give the reader
ideas so that they make adjustments to their own hoist depending on
their garage type.

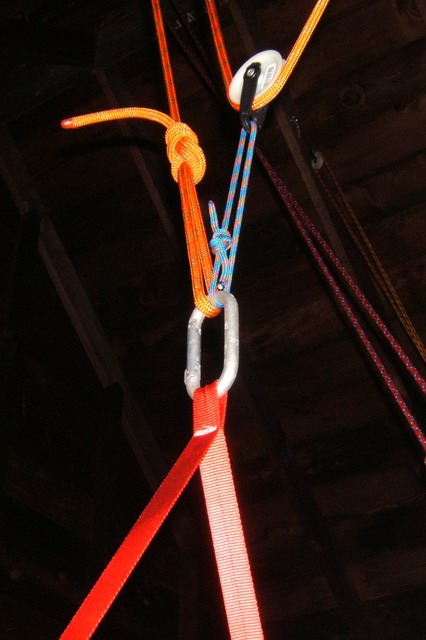
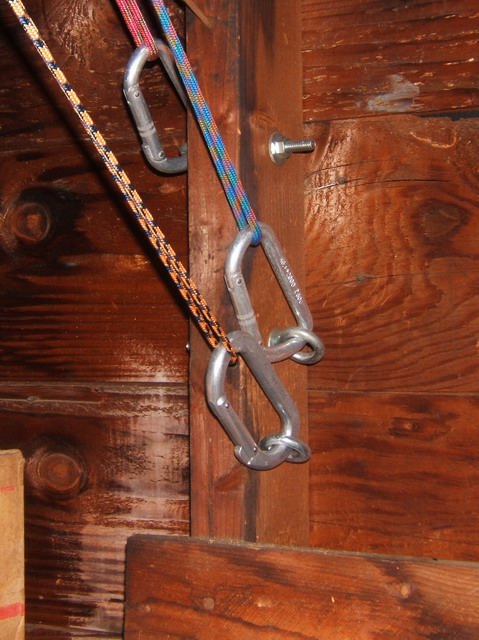
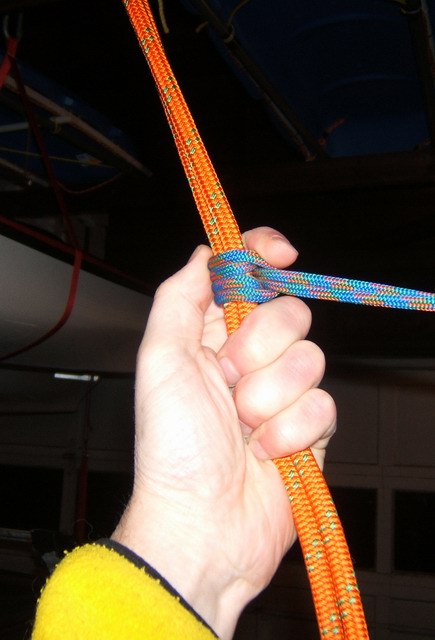
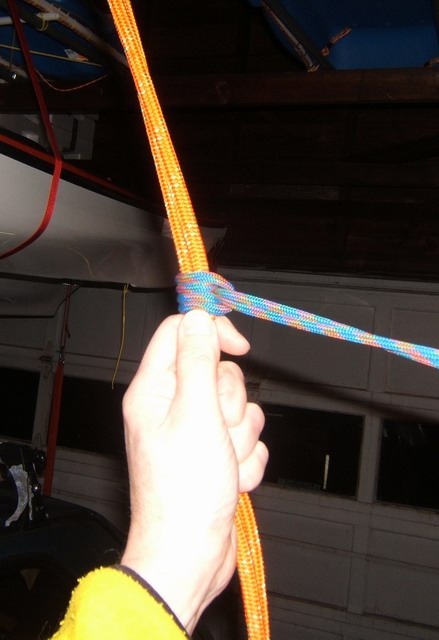
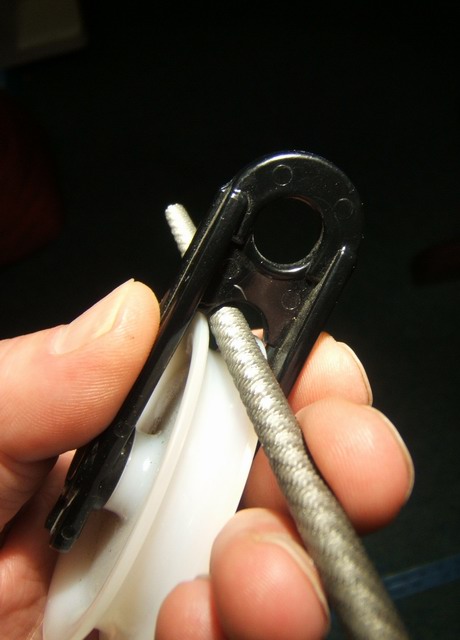
As an important safety feature, the kayaks are not directly tied up with a cleat or hook. A prusik knot is used to keep the kayak under control at all times. The knot is an old climbing knot that locks tight when pulled on, but can be loosened easily with the fingers to slide it up or down on the main rope. The prusik knot is a loop of 5 or 6 mm rope, which has the bottom clipped into a carabiner attached to a wall eyelet bolt. The upper end of the loop is wrapped around the two main hoist ropes with a prusik knot. The two ropes are pulled at the same time. In the photos below the main hoist ropes (overkill with 10.5 mm climbing ropes) come down from the roof pulleys with the tension taken on the prusik knots. A good look at the knot is in the middle photo. The right photo shows the carabiners clipping the prusik loop to the wall.


When raising or lowering the kayak or canoe, the prusik rope is never removed from the main hoist rope or the clip on the wall. You will soon develop a technique where you can use the left hand fingers to loosen and slide the knot while your right arm pulls the kayak up. Look closely at the fore finger and thumb in the photos below. The lower three fingers always have a grip on the ropes. The left photo shows lowering the kayak, and the right photo shows hoisting the kayak. If you have to pull the kayak up with two hands, pull it up a couple of feet then hold it with your strong arm while the other hand slides the prusik knot up the rope to take up the slack. Lowering is just the opposite.
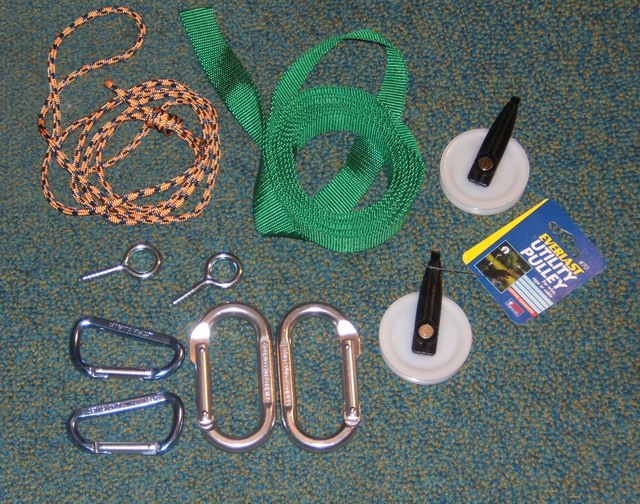
The main parts of the hoist are show below. The pulleys are 2 1/2” clothesline pulleys available at most large hardware stores. If you have real carabiners (about $5 ea) you can use them or to save money use the small “mini” carabiners. The rope should not be a hawser-laid type rope (which twists under load), but 1/4” to 3/8” nylon or poly kernmantle type rope ($7 for 1/4” x 100 ft at Lowes). It took about 100 ft of rope for hanging a kayak near the peak of my garage. If you use the 3/8” rope you may have to file out the pulley opening a little to keep the rope from binding as seen the the third photo below. The thicker rope is not needed for strength, but is easier to grip. Women find it easier to grip if the kayak is heavy. The sling that goes around the kayak is 1” nylon webbing (about 40 cents/ft). You will need about 2 x 10 feet for a kayak. It is sewn into a loop and the top is stitched to form a hole for the carabiner. The attachment to the rafters and wall studs are 5/16” x 4” eye bolts placed through drilled holes. If you have to fasten the hoist to a blank wall, drill a pilot hole into the edge of a stud or rafter and use a screw eye lag. Be sure the screw is in the center of the stud or rafter and that it is able to handle the load. If you don't feel safe, install two screws. Realize that with 4 connections (for a 3x system) to the roof, each is carrying either 1/3 or 1/6 of the weight of the kayak, and the wall prusik is carrying 1/3 the load.

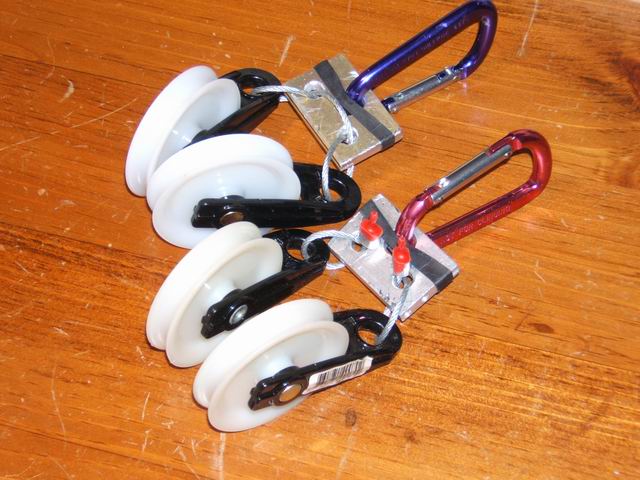
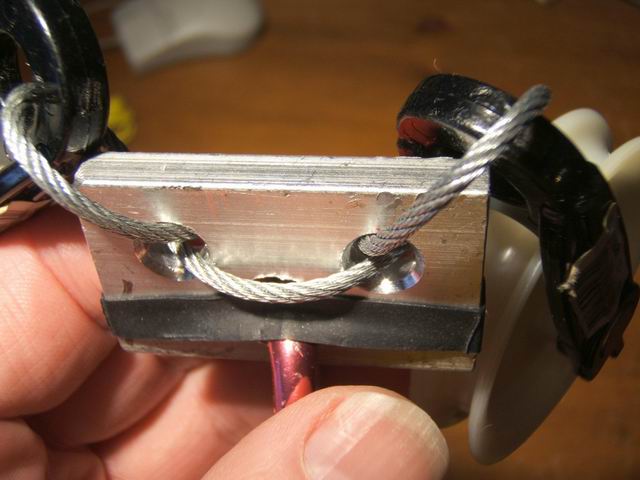
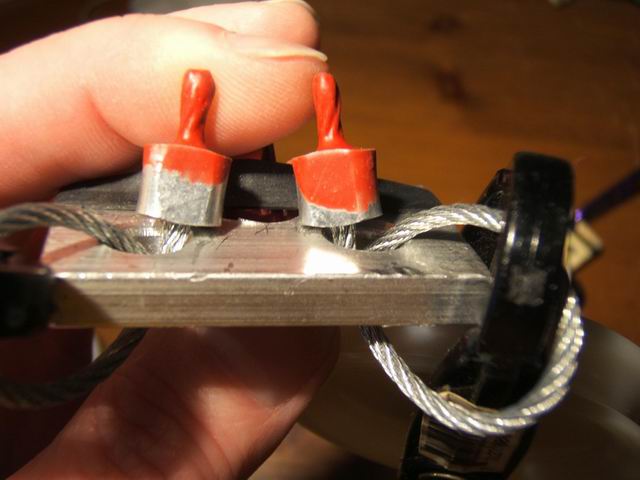
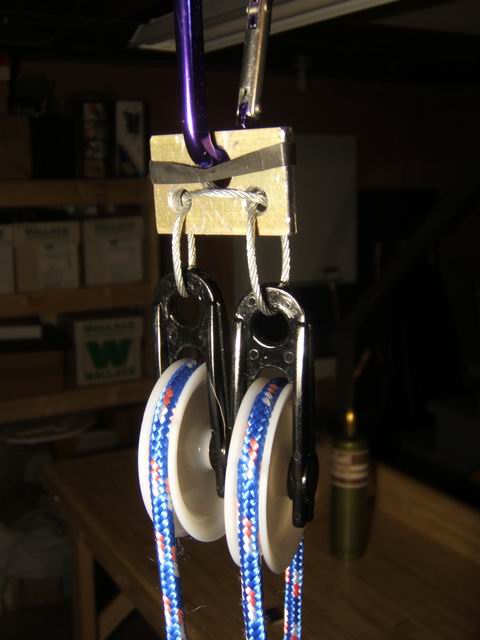
If a heavier kayak or canoe is to be hoisted and you want to use a multiple pulley system, you need to construct two or four double pulley blocks. Below is an example of a simple method of a making pulley blocks by drilling three holes through a thick bar of aluminum. While you don't need to be this fancy, just roping double pulleys together can cause tangling. The single pulleys are wired to the aluminum block with 5/32” wire rope and ferrels. The wire is run through as seen below and the aluminum ferrels are hammered against a vice to close them. The ends were treated with liquid plastic (Plasti Dip brand) to keep the wires from snagging on the rope. Mini-carabiners are used because they required smaller holes in the block. The elastic band keeps the mini-carabiner from shifting, and jamming at a cocked angle, when the rope is slack.
The photo below shows a double block under about 40 pounds load. Any arrangement of pulleys must consider allowing the pullys to remain parallel and free from interference. To see a full installation of a heavy double kayak using a 4:1 double pully system see this photo album.
Update August 9, 2016